Adding a New Menu
You can create a menu by navigating to a folder or by choosing Content > Menus from the left frame of the Workarea. If you choose Content > Menus, it is automatically assigned to the root folder. In contrast, if you create a menu after choosing a content folder, it is assigned to the selected folder.
Adding a Menu via Content Folder
1. Navigate to a content folder.
2. The current language appears as a flag next to the screen title. To create the menu in this language, proceed to the next step.
To change the new menu's language, click View > Language and select the new language.
3. Click New > Menu.
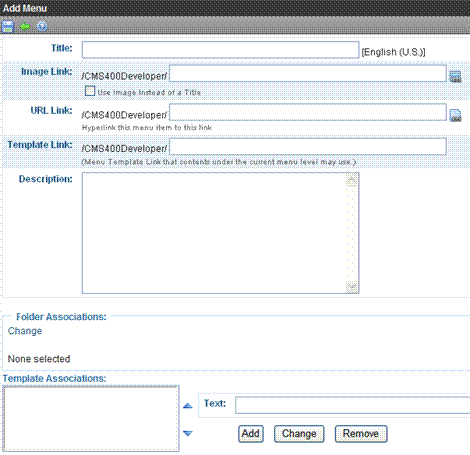
4. The Add Menu screen appears.

5. Use the following table to complete the screen.
Fields on the Add/Edit Menu Screen
|
Field |
Description |
|
The name given to the menu by its creator. It appears on the Web page to indicate the kind of information on the menu. |
|
|
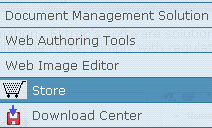
You can have an image appear next to or instead of the menu title. For example:
To do this, follow these steps. Note: Before beginning these steps, the image must reside in the library. if it does not, add it before proceeding. For more information, see Copying Files to the Library. 1. Click image ( 2. The library window opens. 3. Navigate to the folder that contains the image you want to use. 4. Click Insert ( Using Image to Replace Title Text Alternatively, you can replace the menu text with the image, so that only the image appears on the menu. To do this, check the Use image instead of a title box.
|
|
|
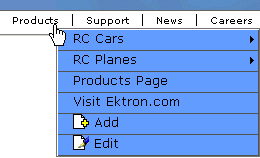
After you create a menu, your developer links it to text or an image on a Web page by modifying a page template. When a site visitor reading that Web page moves the cursor over the text or image, the menu appears. In the illustration below, the menu appears when the site visitor moves the cursor over Products.
You can also assign a URL link to a menu using this field. If you do, and the user clicks the link text or image, he jumps to the specified page. For example, in this field you assign the product landing page, siteroot/products.aspx. In the illustration above, if the user moves the cursor over Products, the assigned menu appears. However, if the user clicks Products (as indicated by the hand), he jumps to siteroot/products.aspx. Entering the Path to the Landing Page This path is relative to the site root. For example: siteroot/jobs.aspx This URL path can be a static template path (like the one mentioned above) or a dynamic path, such as wellness.aspx?id=40&wellness=Hemophilia |
|
|
Note: This field applies to content only. It has no effect on other types of menu items (such as images). Also, this field only affects content that dynamically references a content block, such as /CMS400Min/therapies.aspx?id=84. If the menu option is a template that includes content (for example, /CMS400Min/news.aspx), the template you identify here is ignored. If you want to apply a template to this menu, enter the template here. If you do, all content on this menu uses this template when selected from the menu. If you do not enter a template here, content on this menu uses the template specified in its Quicklink. Overriding the Template Link You can override the menu template for any content item on this menu and, instead, use the template specified in its Quicklink. To do so, follow these steps. 1. Add all items to the menu. (See Adding a New Menu) 2. Go to the View Menus option. 3. Click More Info. 4. Click the menu item you want to change. 5. At the Link field, change the value from Menu Template to Quicklink.
Warning! If you created menus prior to upgrading to this version of Ektron CMS400.NET, those menu items are assigned as Quicklinks. You cannot change them to template links simply by entering a template link here. Instead, you must go to each menu item and change the Link field value from QuickLink to Menu Template (as illustrated above). |
|
|
Add a more detailed description for the menu. |
|
|
Folder Associations |
|
|
Template Associations |
6. Click Save ( ).
).
With the menu added, you may assign menu items to it. See Adding a New Menu.
Adding a Menu via the Menus Tab
1. From the left frame of the Workarea, click Content > Menus > Menus.
2. The current language appears in the View field. To create the menu in this language, proceed to the next step.
To change the new menu's language, select one from the View field dropdown.
3. Click Add Menu ( ).
).
4. Alternatively, hover the cursor over Menus in the left panel, right click the mouse, and click Add Menu.

Note: The Add Menu option does not let you change the new menu's language.
5. The Add Menu screen appears.
6. To complete the fields on the Add Menu screen, see Fields on the Add/Edit Menu Screen.
With the menu added, you may assign menu items to it. See Adding a New Menu.

 ).
).


